In a nutshell
- 🔬 A rubber band creates a capillary break, pins the waterline, and introduces an airflow gap, accelerating run-off and evaporation by disrupting stubborn surface tension and the humid boundary layer.
- 🎯 Smart placement is key: plate rim at the lowest point, thin band near a glass’s rim, mug around the foot, two corners on boards, a tilt on pans—engineer a single drip edge for spotless finishes.
- 💧 Fights hard water marks by turning films into mobile droplets that leave sooner; pairs well with rinse aid or a light vinegar/distilled splash for fewer spots and clearer glassware.
- 🛡️ Prioritise safety and hygiene: replace worn bands, use silicone if latex-sensitive, avoid dishwasher heat, clean and fully dry bands, and store them out of sunlight to preserve elasticity.
- ⚙️ Know the limitations: it won’t fix etched glass; always angle items and rotate a few bands through big loads—an energy-free, towel-free nudge for faster drying.
It sounds absurd until you try it: a humble rubber band that makes freshly washed plates dry faster and glasses finish spotless. In British kitchens, plagued by hard water and the foggy sheen it leaves behind, we crave simple fixes that don’t involve more chemicals or energy. This is one. The band creates a tiny ridge, a gap, a path. Water shifts, air moves, and the maths of droplets changes in your favour. For the price of a 2p loop, dishes can shed rinse water in seconds, not minutes. Here’s how the trick works, why it’s sound, and where to place that band for the sharpest results.
The Physics in Your Sink
Drying isn’t just waiting; it’s a contest between gravity, surface tension, and airflow. On smooth crockery, water clings as a thin film. That film dries slowly and leaves minerals behind. Introduce a rubber band and you create a capillary break. The band’s textured, hydrophobic surface “pins” the waterline, forcing droplets to form and run off rather than spread. Breaking the film is the entire game. Once droplets gather mass, gravity wins earlier, and the plate stops looking like a glazed pond. In parallel, the band provides a millimetre of elevation that lets air slip beneath a glass lip or plate rim, scrubbing the humid boundary layer that slows evaporation.
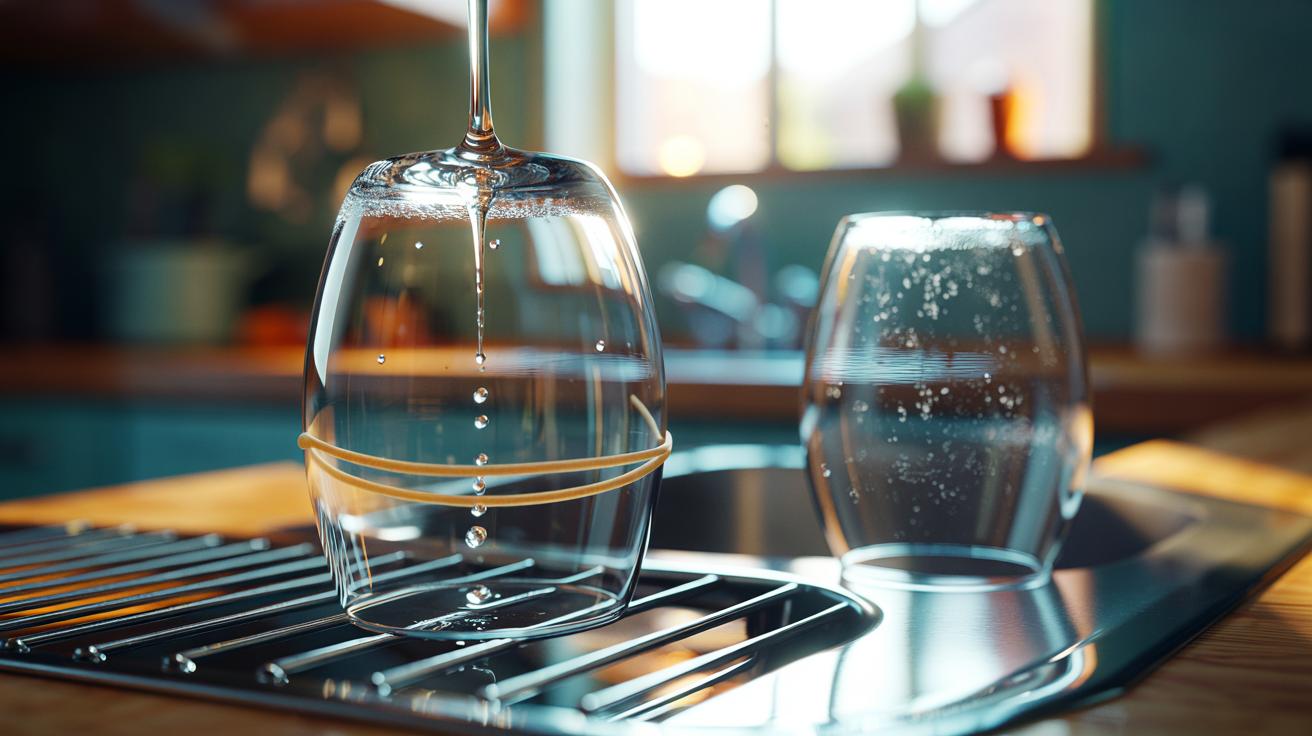
Two effects then compound: quicker drainage and higher evaporation rate. Picture a wine glass inverted on a rack. Without spacing, water pools where the rim meets metal. Add a band around the rim and you get a controlled drip edge plus a micro-gap for airflow. The same holds for mugs with deep foot rings, pans with stubborn beads, and chopping boards that cling to countertops. Small geometry changes drive big drying gains. It’s physics in a washing-up bowl, and it works whether you hand-wash or unload from the dishwasher and want a rapid, streak-free finish.
A Two-Penny Hack: Where to Place the Band
Placement matters. For plates, loop a band snugly around the rim at one point only, then rest the plate on the rack so the banded section sits lowest. This creates a “gutter” where water gathers and exits decisively rather than creeping across the face. For mugs, stretch a band around the outer foot ring; place them upside down with the band forming a slight standoff. Glassware benefits most: fit a thin band near the rim, invert, and watch water stream through a single drip point, not smudge into a fog. One band, one exit, no spots.
Trays and cutting boards can be banded at two corners to lift them for cross-ventilation. Pans? Wrap a band near the handle junction to tilt the pan on the rack, sending beads to a single run-off edge. In dishwashers, add the band post-cycle while the crockery is still warm; 60 seconds of strategic propping often finishes the job without towels. Wipe the band occasionally with soapy water and rinse well. Choose neutral, food-safe elastics if they may contact rims. Do not use near heat sources, and keep bands away from knives to avoid nicks and snapped rubber.
| Item | Band Position | Mechanism | Typical Gain | Note |
|---|---|---|---|---|
| Plates | Single point on rim | Capillary break and tilt | Faster run-off, fewer spots | Place band at lowest edge |
| Wine glasses | Near rim | Drip edge + airflow | Clear, streak-free finish | Use thin, clean band |
| Mugs | Outer foot ring | Standoff space | Stops rim pooling | Avoid decorative glazes |
| Boards | Two corners | Cross-ventilation | Quicker evaporation | Remove before storage |
Why It Prevents Spots and Foggy Sheen
Spots are mineral maps. In areas with hard water, calcium and magnesium remain when the last puddle evaporates. A thin, stationary film dries unevenly, leaving rings and milky haze. The rubber band changes that choreography. It corrals water into thicker, mobile droplets that depart the surface sooner, taking minerals with them. Less water left behind equals fewer deposits. The airflow gap matters too: by thinning the humid layer above the surface, it speeds evaporation without encouraging new film formation. That’s why you see such dramatic improvement on tall glasses and glossy plates.
Consider detergents and rinse aids. They reduce surface tension, flattening water into films that dry more slowly on certain finishes. The band acts as a countermeasure, reintroducing a controlled roughness and a defined drip point. Combine both: a normal wash, then the band method for drying, and you’ll minimise both chemistry and labour. In very hard-water postcodes, a quick distilled water splash or a vinegar final rinse helps, but the band still delivers. No extra power draw. No microfibre lint. Just a physical nudge that beats the spot-forming pathways.
Safety, Hygiene, and Limitations
Rubber is not magic, so treat it sensibly. Replace bands that crack, shed, or smell. If you or guests have latex allergies, use silicone alternatives. Keep bands out of the dishwasher’s heat; they degrade and can tangle spray arms. On heirloom crystal or patterned glazes, test gently—avoid tight pressure that might imprint or mark. Clean the band regularly; it touches rinse water and the odd soap residue, so a quick wash prevents any taint. Dry bands thoroughly to avoid mustiness. Store them away from sunlight to keep elasticity, and pick light-coloured bands so any grime is easy to spot.
The hack won’t fix scratches or etching that already clouds glassware. It also can’t rescue crockery left level on drenched racks. Give gravity a chance: angle items so the banded edge is the lowest path to freedom. If you’re drying a feast’s worth of plates, rotate two or three bands through the stack; you don’t need one per item. Think of the band as a movable drain director, a tiny tool for big gains. In small kitchens where counter space is precious, that’s the difference between clutter and calm.
A rubber band sounds like trivia, yet it rewrites the final act of washing up with clean, elegant physics. You’re creating a drip edge, carving a route for water, and letting air do honest work. It’s thrifty. It’s quick. It makes glassware sing in the light. Once you see fewer spots and faster dry times, you won’t go back. Will you test the band on one plate tonight, try a glass tomorrow, and see how far this tiny loop can transform your drying routine?
Did you like it?4.6/5 (21)